How to download your Data from Etsy
If you're reading this then I'm guessing you want to download some of your data from Etsy? Maybe you're not sure where to find it? Maybe you've found it but you're not sure what to do with it when it's downloaded?
Don't worry - I'm going to walk you through exactly what information you can download from Etsy, where to find it and how to open your files in your spreadsheet programme once they’re on your computer.
If this sounds like the post for you, let's get started.
What Data can I download from Etsy?
At the time of writing you can download the following information
Etsy Payment Account
This is found under Finances > Payment Account and scrolling down until you can choose an individual month.
If you want to know more, check out my detailed post Etsy Payment Account: Everything you need to know
Other Information to Download
For some reason Etsy hides away most of your other downloads under Settings -> Options -> Download Data
You can download a number of different reports from Etsy about your shop and they all come down as CSV files.

At the top you can download a list of all items currently for sale. This downloads all of your Active Listings including Title, Description, Images and Tags.
The bottom section then gives you a choice of 4 different reports. Click on the box CSV Type to make your choice between:
Order Items - all your sales by item. This shows multiple lines per order so you can see exactly what items have been sold.
Orders - all sales by order. This shows you 1 lines for each order
Etsy Payments Sales - all payments for Sales made through Etsy Payments - this is also the source of your Etsy 1099 Report
Etsy Payments Deposits - all deposits made to your bank account
For each of these, you can also choose whether to download for a specific month or get all the data for a full year in one go. Make your choice and save the file onto your computer.
You can read more about downloading your Sold transactions at Etsy help
EXTRA TIP: The Etsy Payments Deposits file is great to use alongside the download of your Etsy Payments Account so you can match up what you've received with the detail of each payment.
If you're looking for the data you need to do your bookkeeping for your Etsy shop, I have some simple templates all ready set up for you that walk you through exactly what you need.
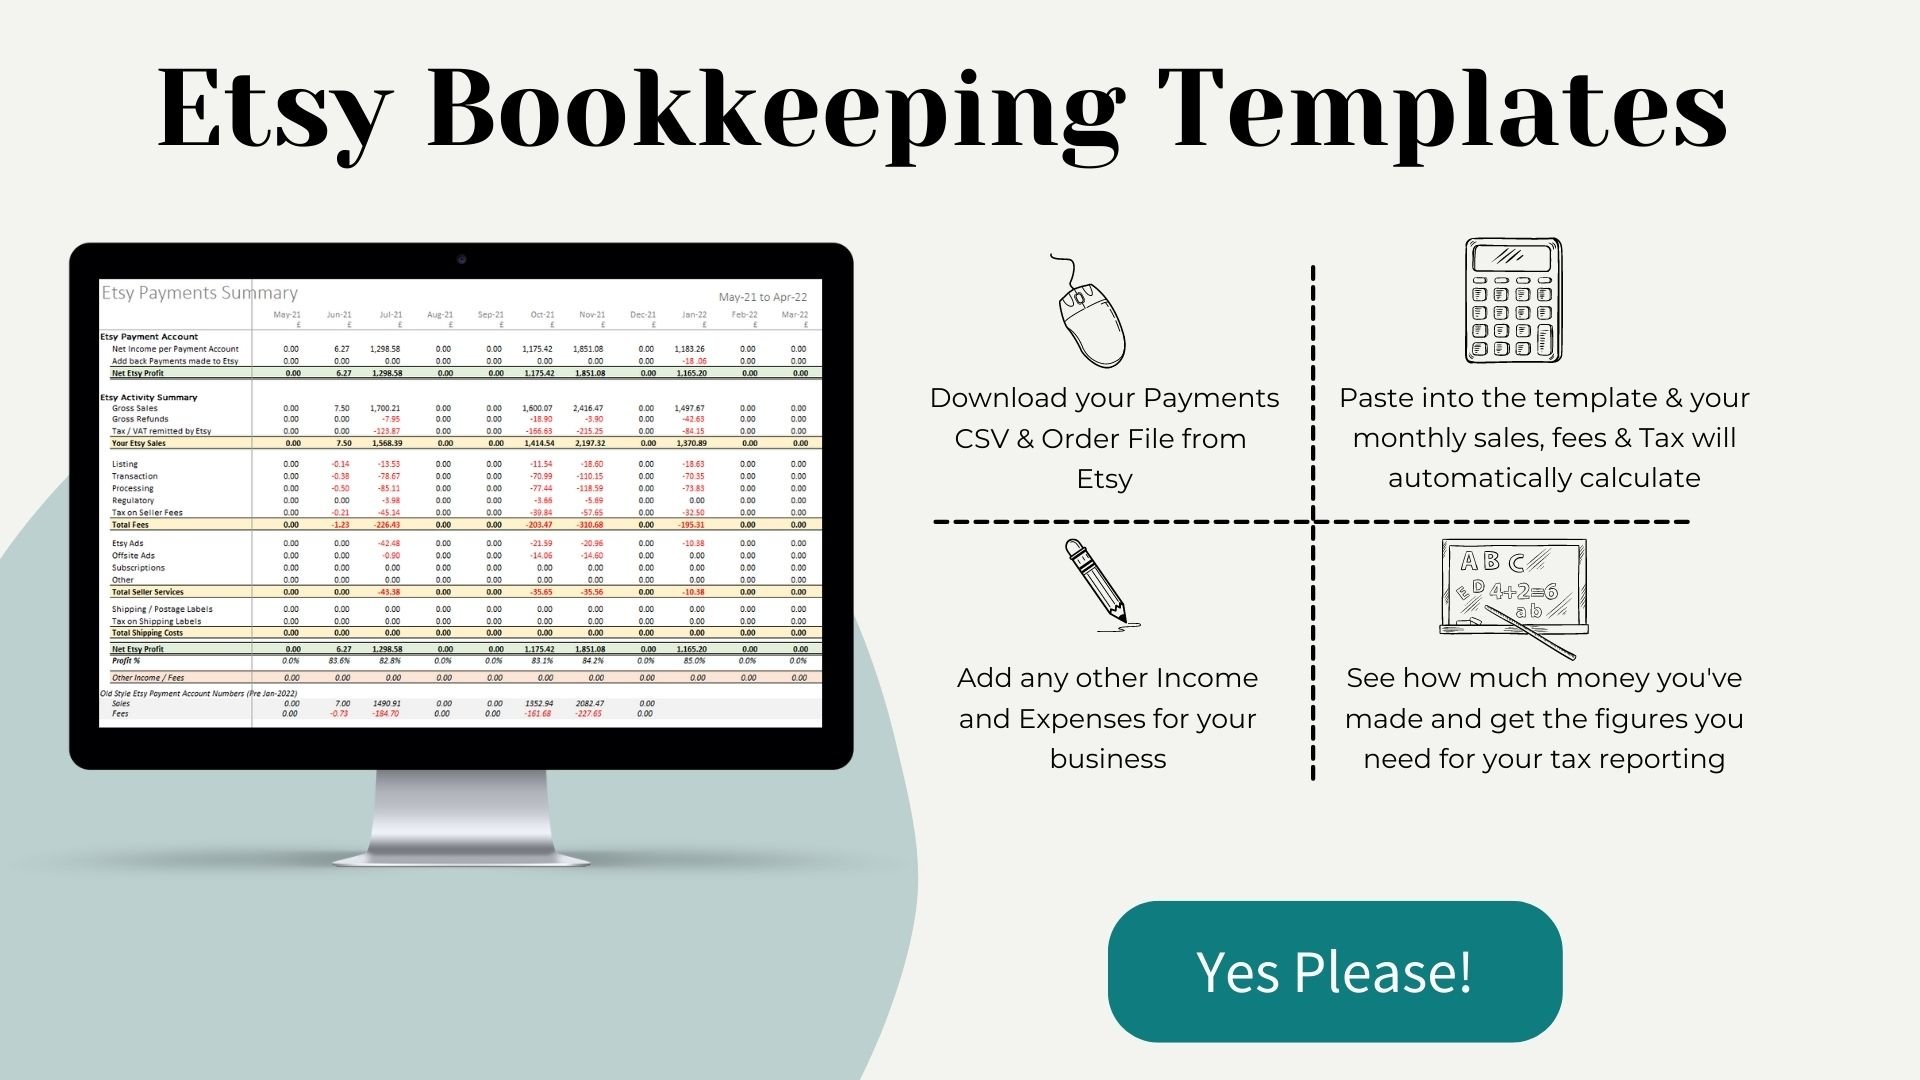
Automated Bookkeeping Templates from Made on the Common
They take your Payments and Order files and automatically translate them into the monthly figures that you need. Versions are available for sellers in UK, USA, Canada, Australia and Europe.
Available now in my Etsy Store at Made on the Common
Hooray - you have now successfully downloaded your Etsy information as a CSV file and saved onto your computer.
So what do you do with it now?
How to see your data in your Spreadsheet
To use your information you first need to open it up in your Spreadsheet programme. The notes below are written for Excel but most Spreadsheet programmes will have a similar process to access your data.
Just so you know, I used the Etsy Payment Report for my examples
Step 1: Open Excel
Go into Excel and select Open to load your CSV file. Browse to the folder where you saved your files and select the one you want to view.
Step 2: Import your Data
Because the data is in CSV format (which just means that it is a text file with the different data sets separated by commas), we need to push the file through the Text Import Wizard to enable Excel to read the data.
Occasionally your file opens straight into Excel without going through the Wizard. If this happens - Happy Days - just double check that your data looks ok.
The Import Wizard works automatically but there are a couple of options we need to select to make sure the data loads correctly.
When you select your file you will see a Text Import window like the one below.

We first need to tell Excel that the file is “Delimited” rather than Fixed Width. Just click the circle next to Delimited and then hit NEXT.
The next step is to tell Excel how the data is separated - Select “Comma” and then Next

You should see that lines have now appeared in the bottom data section splitting the information up into separate columns.
Step 3: Choosing your Column Types
The final step is to tell Excel what sort of data each column contains.
Excel is pretty good at these things & will look at the data you are loading and make its best guess about what type of data it is (Text, number, date etc). It’s not always right but then who is?
This works fine for most columns but we may need to give it a little help with any DATE columns.
The one problem with using any data from Etsy is that the date formats in their downloads are set to the North American standard (Format MM/DD/YY). Obviously this is not a problem if you’re sat in North America reading this so skip to the next section if that’s you :-).
Unfortunately this means that anyone who has their computer set up with a different date format (like me sat in the UK or anyone who usually sees dates as DD/MM/YY), will need to change this if they want to use any date options once the data is loaded into Excel.
If you don’t do this, then 8 January (01/08) will come up as 1 August (08/01) and 15 January (01/15) will be unreadable as it will try to interpret it as 1st day of the 15th Month (15/01)??.
We can help the data load along by changing the format of any date column from General to Date - and then by selecting MDY (Month, Day, Year) in the drop down box as below.
You will need to do this for any and all Date columns in your data (the sales reports have 3)

All other columns should be fine - just scroll right and check that all other columns are “General”.
Once you have done that hit FINISH and your data should appear in Excel separated into neat columns.
If your load looks like this

Data loaded into Excel but not discplaying correctly
Don’t panic - it just means that your columns are not wide enough to show all the information. Make them wider and all will be revealed.
Now Save your File
Once you have your data into Excel the first thing to do is to save the file again.
By saving it as an Excel file (rather than CSV), the next time you open the file it will remember what you have just done. And you'll have a nice clean file to use however you wish.
Just make sure you select "Excel Workbook" in the bottom box as below

That's it
You now have a clean version of your data downloaded onto your computer. You can use this to extract the information you need to run your business, do your taxes and keep up with your bookkeeping.
I highly recommend saving all your Etsy data onto your computer every month so you have a record of your items and transactions.
Make a note in your diary in the first week of each month to download the data from the previous month and you'll be set.
Happy Downloading
Sarah x


Why not Pin this so you can come back to this article later?


